Multi-page applications (MPAs) are getting less popular by the day. Famous platforms such as Facebook, Twitter, YouTube, Github, and many others are already using single-page application (SPA) technology instead.
This trendy technology allows users to engage with web applications speedily and responsively because everything is client-side-rendered. However, it can be a pain for developers who build server-side rendered applications with frameworks like Laravel or Django.
Fortunately, Inertia.js stepped in and came to the rescue.
In this article, we’ll show how you can get started using Inertia.js and how to use it with Laravel, Vue.js, and Tailwind CSS to create a modern blog web app. We’ll also share how to make SPAs more SEO-friendly, as well as a few other tricks.
If you’re just getting started with Laravel, we recommend you read this article first so you’ll be ready to roll.
Why SPA?
Before we can ask why we should use Inertia, we must first ask: “Why SPA?”
Why would anyone prefer client-side rendered applications over traditional server-side applications? What would force a full-stack Laravel developer to say goodbye to blade components?
The short answer: because speed and responsiveness are essential for any successful user engagement.
In the case of MPAs, the browser constantly sends requests to the backend, which then executes numerous database queries. After the database and server process queries and deliver them to the browser, the page is rendered.
But SPAs are different. The application brings everything the user would require straight to the page, eliminating the need for the browser to send queries or reload the page to render new HTML elements.
Because of this one-of-a-kind user experience, many big-name companies are clamoring for their websites to become single-page applications.
That being said, creating a single-page application can be difficult for Laravel developers because it would require them to start using Vue.js or React instead of blade templates, resulting in the loss of many Laravel gems that save time and effort.
Now that we have Inertia.js, though, that’s all changed.
Why Inertia?
If Laravel developers were to build web SPAs with Vue before Inertia, they’d have to set up APIs and return JSON data with Laravel, then use something like AXIOS to retrieve the data in Vue components. They’d also require something like Vue Router to manage routes, which would mean losing Laravel routing, as well as middlewares and controllers.
Inertia.js, on the other hand, enables developers to build modern single-page Vue, React, and Svelte apps using classic server-side routing and controllers. Inertia was designed for Laravel, Ruby on Rails, and Django developers to allow them to build apps without changing their coding techniques of creating controllers, fetching data from a database, and rendering views
Thanks to Inertia.js, Laravel developers will feel right at home.
How Inertia Works
Building SPA only with Laravel and Vue will give you a full JavaScript page for your frontend, but this will not provide you with a single-page app experience. Each clicked link will cause your client-side framework to reboot on the next page load.
This is where Inertia enters the picture.
Inertia is basically a client-side routing library. It allows you to navigate between pages without having to reload the entire page. This is accomplished via the <Link> component, which is a lightweight wrapper around a standard anchor tag.
When you click an Inertia link, Inertia intercepts the click and redirects you to XHR instead. The browser won’t reload the page this way, giving the user a full single-page experience.
Getting Started With Inertia
To understand Inertia and how to integrate it with Laravel, we’re going to build a blog web app named Kinsta Blog using the most powerful combo, Laravel for the backend, Vue.js for the JavaScript frontend, and Tailwind CSS for styling.
If you’d prefer to follow this tutorial in a local environment, you can use DevKinsta, a powerful tool for developers, designers, and agencies that enables them to construct single and multi-page WordPress web apps. Fortunately, WordPress can be easily integrated with Laravel using the Corcel package.
Prerequisites
To get the most out of this tutorial, you should be familiar with the following:
- Laravel basics (installation, database, database migrations, Eloquent Models, controllers, and routing)
- Vue.js basics (installation, structure, and forms)
If you’re feeling unsure, check out these fantastic Laravel free and paid tutorials. Otherwise, let’s jump in.
Step One: Install Core Elements
To focus on Inertia.js and get to the fun part straight away, be sure you have the following setup ready to go:
- Freshly-installed Laravel 9 project named
kinsta-blog - Tailwind CSS CLI installed in our Laravel project
- Two blade components in kinsta-blog/resources/views for viewing the blog’s homepage and a single article on the blog as showing below:
“/resources/views/index.blade.php“:
<!DOCTYPE html> <html lang="{{ str_replace('_', '-', app()->getLocale()) }}"> <head> <meta charset="utf-8" /> <meta name="viewport" content="width=device-width, initial-scale=1" /> <title>Kinsta Blog</title> </head> <body> <header> <h1>Kinsta Blog</h1> </header> <main> <h2>Read our latest articles</h2> <section> <article> <div> <img src="https://kinsta.com/images/kinsta-logo.png" alt="Article thumbnail" /> </div> <h3>Title for the blog</h3> <p> Lorem, ipsum dolor sit amet consectetur adipisicing elit. Illum rem itaque error vel perferendis aliquam numquam dignissimos, expedita perspiciatis consectetur! </p> <a href="#">Read more</a> </article> </section> </main> <footer> <h2>Join our Newsletter</h2> <input type="email" /> </footer> </body> </html>“/resources/views/show.blade.php“:
<!DOCTYPE html> <html lang="{{ str_replace('_', '-', app()->getLocale()) }}"> <head> <meta charset="utf-8" /> <meta name="viewport" content="width=device-width, initial-scale=1" /> <title>Kinsta Blog</title> </head> <body> <main> <article> <div> <img src="https://kinsta.com/images/kinsta-logo.png" alt="Article thumbnail" /> </div> <h1>Title for the blog</h1> <p>Article content goes here</p> </article> </main> <footer> <h2>Join our Newsletter</h2> <input type="email" /> </footer> </body> </html> - MySQL local database named
kinsta_blogconnected to our project:“.env“:
DB_CONNECTION=mysql DB_HOST=127.0.0.1 DB_PORT=3306 DB_DATABASE=kinsta_blog DB_USERNAME=root DB_PASSWORD= - Article model, migrations, and factories:
“app/Models/Article.php“:
<?php namespace AppModels; use IlluminateDatabaseEloquentFactoriesHasFactory; use IlluminateDatabaseEloquentModel; class Article extends Model { use HasFactory; protected $fillable = ['title', 'excerpt', 'body']; }“database/migrations/create_articles_table.php“:
<?php use IlluminateDatabaseMigrationsMigration; use IlluminateDatabaseSchemaBlueprint; use IlluminateSupportFacadesSchema; return new class extends Migration { public function up() { Schema::create('articles', function (Blueprint $table) { $table->id(); $table->string('title'); $table->text('excerpt'); $table->text('body'); $table->timestamps(); }); } public function down() { Schema::dropIfExists('articles'); } };“database/factories/ArticleFactory.php“:
<?php

namespace DatabaseFactories;

use IlluminateDatabaseEloquentFactoriesFactory;

class ArticleFactory extends Factory
{

    public function definition()
    {
        return [
            'title' => $this->faker->sentence(6),
            'excerpt' => $this->faker->paragraph(4),
            'body' => $this->faker->paragraph(15),
        ];
    }
}
That’s all we need to get started! Now let’s get down to business and introduce Inertia.js to our project.
Step 2: Install Inertia
The Inertia installation process is divided into two major phases: server-side (Laravel) and client-side (VueJs).
The official installation guide in the Inertia documentation is a little out of date because Laravel 9 now uses Vite by default, but we’ll go through that as well.
1. Server-Side
First thing we need to do is to install Inertia server-side adapters with the below terminal command via Composer.
composer require inertiajs/inertia-laravelNow we’ll set up our root template, which will be a single blade file that will be used to load your CSS and JS files, as well as an Inertia root that will be used to launch our JavaScript application.
Because we’re using the most recent version Laravel 9 v9.3.1, we must also enable Vite to work its magic by including it within our tags in /resources/views/app.blade.php :
<!DOCTYPE html>
<html lang="{{ str_replace('_', '-', app()->getLocale()) }}">
  <head>
    <meta charset="utf-8" />
    <meta name="viewport" content="width=device-width, initial-scale=1" />

    <!-- Fetch project name dynamically -->
    <title inertia>{{ config('app.name', 'Laravel') }}</title>

    <!-- Scripts -->
    @vite('resources/js/app.js') @inertiaHead
  </head>

  <body class="font-sans antialiased">
    @inertia
  </body>
</html>
Notice how we are able to fetch the project title dynamically by adding the Inertia attribute to the <title> tags.
We also added the @vite directive to the head in order to let Vite know the path of our JavaScript main file where we created our app and imported our CSS. Vite is a tool that helps with JavaScript and CSS development by allowing developers to view frontend changes without having to refresh the page during local development.
Our next move will be creating HandleInertiaRequests middleware and publishing it to our project. We can do that by firing the below terminal command within the root directory of our project:
php artisan inertia:middlewareOnce this is complete, head to “App/Http/Kernel” and register HandleInertiaRequests as the last item in your web middlewares:
'web' => [
    // ...
    AppHttpMiddlewareHandleInertiaRequests::class,
],
2. Client-Side
Next, we have to install our frontend Vue.js 3 dependencies in the same way as on the server-side:
npm install @inertiajs/inertia @inertiajs/inertia-vue3
// or
yarn add @inertiajs/inertia @inertiajs/inertia-vue3
Next, you need to pull in Vue.js 3:
npm install [email protected]Then update your primary JavaScript file to initialize Inertia.js with Vue.js 3, Vite, and Laravel:
“resources/js/app.js“:
import "./bootstrap";
import "../css/app.css";

import { createApp, h } from "vue";
import { createInertiaApp } from "@inertiajs/inertia-vue3";
import { resolvePageComponent } from "laravel-vite-plugin/inertia-helpers";

createInertiaApp({
  title: (title) => `${title} - ${appName}`,
  resolve: (name) =>
    resolvePageComponent(
      `./Pages/${name}.vue`,
      import.meta.glob("./Pages/**/*.vue")
    ),
  setup({ el, app, props, plugin }) {
    return createApp({ render: () => h(app, props) })
      .use(plugin)
      .mount(el);
  },
});
In the above code snippet, we use Laravel’s plugin resolvePageComponent, and we tell it to resolve our components from the directory ./Pages/$name.vue. This is because we will save our Inertia components in this directory later in our project, and this plugin will assist us in automatically loading those components from the correct directory.
All what is left is to install vitejs/plugin-vue:
npm i @vitejs/plugin-vueAnd update vite.config.js file:
import { defineConfig } from "vite";
import laravel from "laravel-vite-plugin";
import vue from "@vitejs/plugin-vue";

export default defineConfig({
  plugins: [
    laravel({
      input: ["resources/css/app.css", "resources/js/app.js"],
      refresh: true,
    }),
    vue({
      template: {
        transformAssetUrls: {
          base: null,
          includeAbsolute: false,
        },
      },
    }),
  ],
});
Final step is to install our dependencies and compile our files:
npm install

npm run dev
And voilà! You’ve got yourself a working Laravel 9 application with Vue.js 3 and Vite. Now we need to see something happening in action!
Creating Inertia Pages
Do you remember those two blade files (index and show) for viewing our homepage and a single article?
The only blade file we’ll need while using Inertia is app.blade.php, which we used once already when we were installing Inertia. So what happens to those files now?
We will transform those files from blade components into Inertia.js components.
Each page in your application has its own controller and JavaScript component with Inertia. This lets you obtain only the data required for that page, without using an API. Inertia pages are nothing more than JavaScript components, in our case, they’re Vue.js components. They don’t have anything particularly noteworthy about them. So what we will be doing is wrapping all HTML content between <template> tags and anything related to JavaScript will be wrapped with <script> tags.
Create a folder called “Pages” and move your files there. So we’ll have “index.blade.php” and “show.blade.php” in “./resources/js/Pages“. Then we will alter the file format to “.vue” instead of “.blade.php” while making the first letter of their names uppercase and turn its content into a standard Vue.js component. We will exclude the <html>, <head>, and <body> tags because they are already included in the main root blade component.
“resources/js/Pages/Index.vue“:
<script setup>
  //
</script>

<template>
  <header>
    <h1>Kinsta Blog</h1>
  </header>

  <main>
    <h2>Read our latest articles</h2>

    <section>
      <article>
        <div>
          <img src="https://kinsta.com/images/kinsta-logo.png" alt="Article thumbnail" />
        </div>

        <h3>Title for the blog</h3>
        <p>
          Lorem, ipsum dolor sit amet consectetur adipisicing elit. Illum rem
          itaque error vel perferendis aliquam numquam dignissimos, expedita
          perspiciatis consectetur!
        </p>

        <a href="#">Read more</a>
      </article>
    </section>
  </main>

  <footer>
    <h2>Join our Newsletter</h2>

    <input type="email" />
  </footer>
</template>“resources/js/Pages/Show.vue“:
<script setup>
  //
</script>

<template>
  <header>
    <h1>Welcome to Kinsta Blog</h1>
  </header>

  <main>
    <article>
      <h1>Title for the blog</h1>

      <p>Article content goes here</p>
    </article>
  </main>

  <footer>
    <h2>Join our Newsletter</h2>

    <input type="email" />
  </footer>
</template>
There is something really bothering me! We keep copying and pasting our header and footer in each component which isn’t a very good practice. Let’s create an Inertia basic Layout to store our persistent components.
Create a folder called “Layouts” in “/resources/js” and within that folder create a file named “KinstaLayout.vue”. This file will have our header and footer and the main with a <slot /> to allow all components wrapped with this layout to be embedded inside it. This file should look like this :
“resources/js/Layouts/KinstaLayout.vue“:
<script setup></script>

<template>
    <header>
    <h1>Kinsta Blog</h1>
  </header>

  <main>
        <slot />
  </main>

  <footer>
    <h2>Join our Newsletter</h2>

    <input type="email" />
  </footer>

</template>
Then we are going to import this new layout in our pages and wrap all the HTML content with it. Our components should look like this:
Index.vue:
<script setup>
import KinstaLayout from "../Layouts/KinstaLayout.vue";
</script>

<template>
  <KinstaLayout>
    <section>
      <h2>Read our latest articles</h2>
      <article>
        <div>
          <img src="https://kinsta.com/images/kinsta-logo.png" alt="Article thumbnail" />
        </div>

        <h3>Title for the blog</h3>
        <p>
          Lorem, ipsum dolor sit amet consectetur adipisicing elit. Illum rem
          itaque error vel perferendis aliquam numquam dignissimos, expedita
          perspiciatis consectetur!
        </p>

        <a href="#">Read more</a>
      </article>
    </section>
  </KinstaLayout>
</template>Show.vue:
<script setup>
 import KinstaLayout from "../Layouts/KinstaLayout.vue";
</script>

<template>
  <KinstaLayout>
    <article>
      <h1>Title for the blog</h1>

      <p>Article content goes here</p>
    </article>
  </KinstaLayout>
</template>
Laravel Routes and Inertia Render
First let’s use the “ArticleFactory” file we have from our tutorial starting point and seed some articles into our database.
“database/seeders/databaseSeeder.php“:
<?php

namespace DatabaseSeeders;

use AppModelsArticle;
use IlluminateDatabaseSeeder;

class DatabaseSeeder extends Seeder
{
    public function run()
    {
        Article::factory(10)->create();
    }
}
Then hit the below terminal command to migrate your tables and seed the fake data from the factories:
php artisan migrate:fresh --seedThis will create 10 fake articles in the database, which we will need to pass to our view using Laravel routing. Now that we’re using Inertia to render views, the way we used to write our routes will slightly change. Let’s create our first Laravel Inertia route in “routes/web.php” and return the homepage view from “/resources/js/Pages/Index.vue“.
“routes/web.php“:
<?php

use AppModelsArticle;
use IlluminateSupportFacadesRoute;
use InertiaInertia;

Route::get('/', function () {
    return Inertia::render('Index', [
        'articles' => Article::latest()->get()
    ]);
})->name('home');
Notice that we imported Inertia and did not use the view() Laravel helper to return the view, but instead used Inertia::render. Inertia will also by default look for the file name we mentioned in our route in the Pages folder at “resources/js”.
Head to the index file and set the retrieved data as a prop and loop over them with v-for to show the results. Between the script tags, define the passed data as a prop. All Inertia needs to know is what type of data you’re expecting, which in our case is an ‘Article’ object containing an array of articles.
“resources/js/Pages/Index.vue“:
<script setup>
import KinstaLayout from "../Layouts/KinstaLayout.vue";

  defineProps({
    Articles: Object,
  });
</script>
Note that it’s enough to only define it as a prop without returning it because we’re using the setup format for Vue.js 3 composition API. If we’re using options API then we would need to return it.
Let’s make the loop:
<template>
<KinstaLayout>
<h2>Read our latest articles</h2>
<section>
// Looping over articles
<article v-for="article in articles":key="article.id">
<div>
<img src="https://kinsta.com/images/kinsta-logo.png" alt="Article thumbnail" />
</div>
<h3>{{article.title}}</h3>
<p>{{article.excerpt}}</p>
<a href="#">Read more</a>
</article>
</section>
</KinstaLayout>
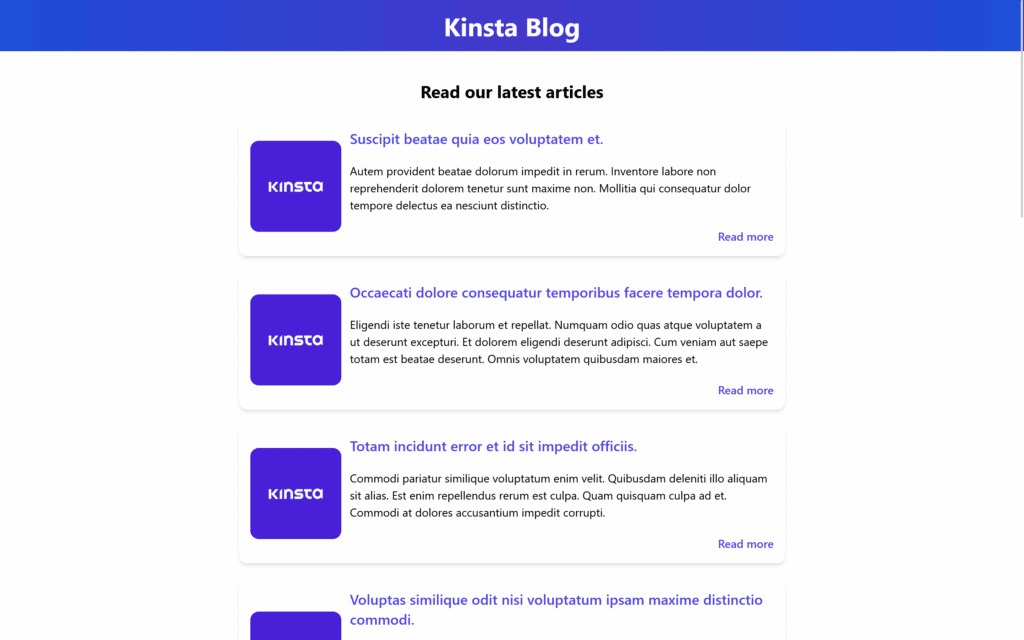
</template>npm run dev (leave it running because we’re using Vite) and php artisan serve to start the laravel development server and access our website, we’ll see the expected page displaying all ten articles in the database.
Now, we’re using Google Chrome’s Vue DevTools extension, which allows us to debug my application. Let’s show you how our data is being passed to the component.
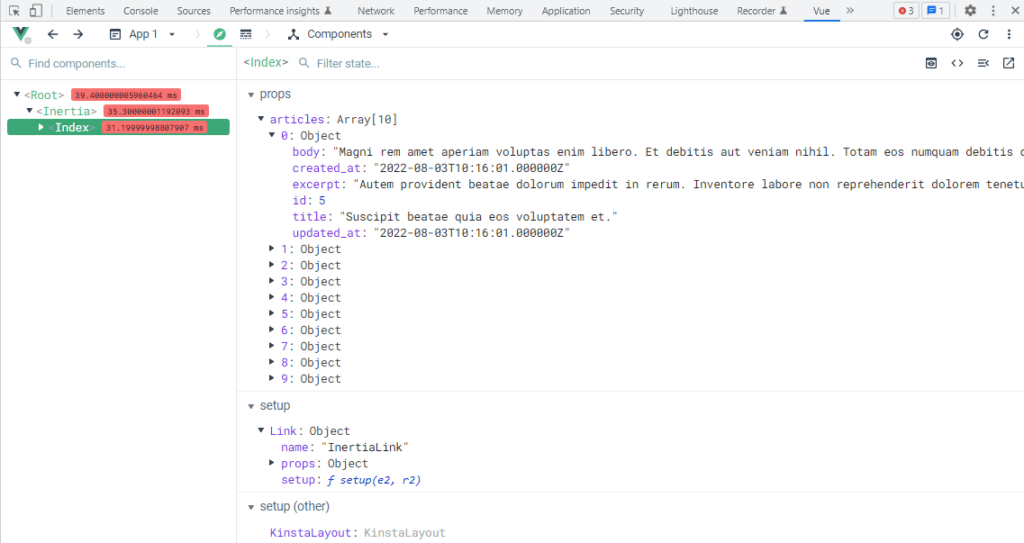
“Articles” is passed to the component as a prop object containing an array of articles; each article in the array is also an object with properties that correspond to the data it acquired from the database. This means that any data we transfer from Laravel to Inertia will be treated as a prop.
Using Tailwind CSS With Inertia.js
Since Tailwind is already installed in our project at the starting point, all we need to do is tell it to read our Inertia components. This may be accomplished by editing “tailwind.config.js” as follows:
/** @type {import('tailwindcss').Config} */
module.exports = {
  content: [
    "./storage/framework/views/*.php",
    "./resources/views/**/*.blade.php",
    "./resources/js/**/*.vue",
  ],
  theme: {
    extend: {},
  },
  plugins: [],
};
Then make sure that we have imported our CSS file in “resources/js/app.js“:
import "../css/app.css";And now we’re ready to style our components.
“resources/js/Pages/Index.vue“:
<script setup>
import KinstaLayout from "../Layouts/KinstaLayout.vue";

  defineProps({
    articles: Object,
  });
</script>

<template>
 <KinstaLayout>
    <h2 class="text-2xl font-bold py-10">Read our latest articles</h2>

    <section class="space-y-5 border-b-2 pb-10">
      <article
        v-for="article in articles"
        :key="article.id"
        class="flex justify-center items-center shadow-md bg-white rounded-xl p-4 mx-auto max-w-3xl"
      >

         <img
            src="https://kinsta.com/images/kinsta-logo.png"
            class="w-32 h-32 rounded-xl object-cover"
            alt=""
         />

        <div class="flex flex-col text-left justify-between pl-3 space-y-5">
          <h3
            class="text-xl font-semibold text-indigo-600 hover:text-indigo-800"
          >
            <a href="#">{{ article.title }}</a>
          </h3>
          <p>
           {{ article.excerpt }}
          </p>
          <a
            href="#"
            class="text-indigo-600 hover:text-indigo-800 w-fit self-end font-semibold"
            >Read more</a
          >
        </div>
      </article>
    </section>
 </KinstaLayout>
</template>“resources/js/Layouts/KinstaLayout.vue“:
<script setup></script>

<template>
    <Header
        class="bg-gradient-to-r from-blue-700 via-indigo-700 to-blue-700 w-full text-center py-4"
    >
        <h1 class="text-white font-bold text-4xl">Kinsta Blog</h1>
    </Header>

    <main class="container mx-auto text-center">
        <slot />
    </main>

    <footer
        class="bg-gradient-to-b from-transparent to-gray-300 w-full text-center mt-5 py-10 mx-auto"
    >
        <h2 class="font-bold text-xl pb-5">Join our Newsletter</h2>

        <input
            class="rounded-xl w-80 h-12 px-3 py-2 shadow-md"
            type="email"
            placeholder="Write your email.."
        />
    </footer>
</template>
If you look at the browser, you’ll notice that Vite has already updated the page with Tailwind magic.
Inertia Links
Now that we have a working homepage that can display all articles in the database, we need to create another route to display individual articles. Let’s create a new route and set the URL to an “id” wildcard:
“routes/web.php”
<?php

use AppModelsArticle;
use IlluminateSupportFacadesRoute;
use InertiaInertia;

Route::get('/', function () {
    return Inertia::render('Index', [
        'articles' => Article::latest()->get()
    ]);
})->name('home');

Route::get('/posts/{article:id}', function (Article $article) {
    return Inertia::render('Show', [
        'article' => $article
    ]);
})->name('article.show');
We imported the “Article” model and added a new route to return the Show.vue Inertia component. We also leveraged Laravel’s route model binding, which allows Laravel to automatically get the article we’re referring to.
All we need now is a way to visit this route by clicking on a link from the homepage without having to reload the entire page. This is possible with Inertia’s magical tool <Link>. We mentioned in the introduction that Inertia uses <Link> as a wrapper for a standard anchor tag <a>, and that this wrapper is meant to make page visits as seamless as possible. In Inertia, the <Link> tag can behave as an anchor tag that performs <GET> requests, but it can also act as a <button> and a <form> at the same time. Let’s see how we can apply it to our project.
In our Index.vue, we will import <Link> from Inertia, and remove the anchor tags <a> and replace it with Inertia <Link> tags. The href attribute will be set to the route URL that we previously made for viewing the article:
<script setup>
import KinstaLayout from "../Layouts/KinstaLayout.vue";
import { Link } from "@inertiajs/inertia-vue3";

defineProps({
    articles: Object,
});
</script>

<template>
    <KinstaLayout>
        <section class="space-y-5 border-b-2 pb-10">
            <h2 class="text-2xl font-bold pt-10 mx-auto text-center">
                Read our latest articles
            </h2>

            <article
                v-for="article in articles"
                :key="article.id"
                class="flex justify-center items-center shadow-md bg-white rounded-xl p-4 mx-auto max-w-3xl"
            >
                <img
                    src="https://kinsta.com/images/kinsta-logo.png"
                    class="w-32 h-32 rounded-xl object-cover"
                    alt=""
                />

                <div
                    class="flex flex-col text-left justify-between pl-3 space-y-5"
                >
                    <h3
                        class="text-xl font-semibold text-indigo-600 hover:text-indigo-800"
                    >
                        <Link :href="'/posts/' + article.id">{{
                            article.title
                        }}</Link>
                    </h3>
                    <p>
                        {{ article.excerpt }}
                    </p>
                    <Link
                        :href="'/posts/' + article.id"
                        class="text-indigo-600 hover:text-indigo-800 w-fit self-end font-semibold"
                        >Read more
                    </Link>
                </div>
            </article>
        </section>
    </KinstaLayout>
</template>
Let’s style Show.vue with Tailwind to make it look a bit more dressed up and ready for our visit. And also we need to let it know that it should expect an “Article” object and set it as a prop:
<script setup>
import KinstaLayout from "../Layouts/KinstaLayout.vue";

defineProps({
    article: Object,
});
</script>

<template>
    <KinstaLayout>
        <article class="mx-auto mt-10 flex justify-center max-w-5xl border-b-2">
            <img
                src="https://kinsta.com/images/kinsta-logo.png"
                class="w-80 h-80 rounded-xl mx-auto py-5"
                alt=""
            />
            <div class="text-left flex flex-col pt-5 pb-10 px-10">
                <h1 class="text-xl font-semibold mb-10">{{ article.title }}</h1>
                <p>{{ article.body }}</p>
            </div>
        </article>
    </KinstaLayout>
</template>
Now when we click on the article title or “Read more”, we will be magically transported to Show.vue without refreshing the page.
In our case, we’re using <Link> as an anchor tag that sends a GET request to the route and return back the new data, but we can use <Link> to also POST, PUT, PATCH and DELETE
“routes/web.php“:
<Link href="https://kinsta.com/logout" method="post" as="button" type="button">Logout</Link>Laravel Inertia Tips and Tricks You Should Know
We now have a working SPA built with Laravel, Inertia, and Tailwind CSS. But inertia can help us achieve so much more. It’s time to acquire some Inertia techniques that will help both developers and application visitors.
Generating URLs
You may have noticed we’ve been adding names to our Laravel routes without using it. Inertia allows us to use our named routes within our components instead of manually writing down the full route.
We can achieve this by installing the Ziggy package in our project:
composer require tightenco/ziggyThen head to “resources/js/app.js” and update it like this:
import "./bootstrap";
import "../css/app.css";

import { createApp, h } from "vue";
import { createInertiaApp } from "@inertiajs/inertia-vue3";
import { resolvePageComponent } from "laravel-vite-plugin/inertia-helpers";
import { ZiggyVue } from "../../vendor/tightenco/ziggy/dist/vue.m";

createInertiaApp({
    title: (title) => `${title} - ${appName}`,
    resolve: (name) =>
        resolvePageComponent(
            `./Pages/${name}.vue`,
            import.meta.glob("./Pages/**/*.vue")
        ),
    setup({ el, app, props, plugin }) {
        return createApp({ render: () => h(app, props) })
            .use(plugin)
            .use(ZiggyVue, Ziggy)
            .mount(el);
    },
});
Head to “/resources/views/app.blade.php” and update the head with @route directive:
<!DOCTYPE html>
<html lang="{{ str_replace('_', '-', app()->getLocale()) }}">

<head>
    <meta charset="utf-8">
    <meta name="viewport" content="width=device-width, initial-scale=1">

    <!-- Fetch project name dynamically -->
    <title inertia>{{ config('app.name', 'Laravel') }}</title>

    <!-- Scripts -->
    @routes
    @vite('resources/js/app.js')
    @inertiaHead
</head>

<body class="font-sans antialiased">
    @inertia
</body>

</html>
…and refresh your NPM packages by hitting the below two terminal commands:
npm install && npm run devThis package allows us to use named routes within our Inertia components, so let’s head to Index.vue and remove the old manual route and replace it with the route name while passing the data normally as if we were in our controller.
We will replace this:
<Link :href="'/posts/' + article.id">
   {{ article.title }}
</Link>
…with this:
<Link :href="https://kinsta.com/blog/laravel-inertia/route("article.show', article.id)">
   {{ article.title }}
</Link>
This will give us the exact same behavior we had but it’s more developer friendly and extremely helpful when your route expects many parameters.
Progress Indicators
This is one of the nicest features of Inertia.js; because SPA provides an interactive user experience, having constant feedback whether a request is loading would be a fantastic addition to the application. This can be accomplished by a separate library Inertia is offering.
The “@inertiajs/progress” library is a wrapper around NProgress that conditionally shows the loading indicators according to Inertia events. You don’t really need to know how this works behind the scenes, so let’s just get it working.
We can install this library with the below terminal command:
npm install @inertiajs/progressOnce it’s installed, we need to import it in “resources/js/app.js”
import "./bootstrap";
import "../css/app.css";

import { createApp, h } from "vue";
import { createInertiaApp } from "@inertiajs/inertia-vue3";
import { resolvePageComponent } from "laravel-vite-plugin/inertia-helpers";
import { ZiggyVue } from "../../vendor/tightenco/ziggy/dist/vue.m";
import { InertiaProgress } from "@inertiajs/progress";

createInertiaApp({
    title: (title) => `${title} - ${appName}`,
    resolve: (name) =>
        resolvePageComponent(
            `./Pages/${name}.vue`,
            import.meta.glob("./Pages/**/*.vue")
        ),
    setup({ el, app, props, plugin }) {
        return createApp({ render: () => h(app, props) })
            .use(plugin)
            .use(ZiggyVue, Ziggy)
            .mount(el);
    },
});

InertiaProgress.init({ color: "#000000", showSpinner: true });
This will show a loading bar and a loading spinner in black color, but we can change the color along with other helpful options that can be found on Inertia.js progress indicator documentation.

Scroll Management
In some cases, you may want to navigate to a new page while maintaining the same scroll position. Perhaps you’ll need this if you allow users to leave comments; this will submit a form and load the new comment from the database into your component; you’ll want this to happen without the user losing scroll position. Inertia takes care of this for us.
In our case, let’s apply this to our <Link> tag in Index.vue. To preserve scroll position while redirecting to a different page with Inertia’s <Link>, all what we need to do is to add preserve-scroll attribute to the <Link>:
<Link :href="https://kinsta.com/blog/laravel-inertia/route("article.show', article.id)" preserve-scroll>
  {{ article.title }}
</Link>
SEO Tips
Since the birth of SPAs, people have been concerned about search engine optimization (SEO). It is commonly known that if you use the SPA approach, search engines will have a difficult time crawling your web application because everything is client-side rendered, resulting in your website not showing at the top of search results; nevertheless, how come those popular platforms like Facebook and Github are now SPAs and still performing well in SEO?
Well, this isn’t a mission: impossible anymore. Inertia is offering a few solutions to help your SPA become SEO friendly.
Inertia Vue SSR With Laravel and Vite
Search engines are always looking for HTML on your website in order to identify the content; however, if you don’t have HTML in your URLs, this job gets more difficult. When developing SPAs, all you have on your page is JavaScript and JSON. Inertia introduced a Server-Side Rendering (SSR) feature that you can add to your application. This allows your app to pre-render an initial page visit on the server and then send the rendered HTML to the browser. This lets users see and interact with your pages before they fully load, and it also has other advantages, like shortening the time it takes search engines to index your site.
To summarize how it works, Inertia will identify whether it is running on a Node.js server and will render the component names, properties, URL, and assets version to HTML. This will provide the user and the search engine with practically everything your page has to offer.
However, because we’re dealing with Laravel, this makes little sense because Laravel is a PHP framework and does not run on a Node.js server. Therefore, we will forward the request to a Node.js service, which will render the page and return HTML. This will make our Laravel Vue application SEO friendly by default.
First, we need to install the Vue.js SSR npm package:
npm install @vue/server-rendererAnother helpful Inertia “NPM” package provides a simple “HTTP” server. It is strongly recommended that you install it:
npm install @inertiajs/serverThen, in “resources/js/”, we’ll add a new file named ssr.js. This file will be very similar to the app.js file we created when installing Inertia, only it will execute in Node.js rather than the browser:
import { createSSRApp, h } from "vue";
import { renderToString } from "@vue/server-renderer";
import { createInertiaApp } from "@inertiajs/inertia-vue3";
import createServer from "@inertiajs/server";
import { resolvePageComponent } from "laravel-vite-plugin/inertia-helpers";
import { ZiggyVue } from "../../vendor/tightenco/ziggy/dist/vue.m";

const appName = "Laravel";

createServer((page) =>
    createInertiaApp({
        page,
        render: renderToString,
        title: (title) => `${title} - ${appName}`,
        resolve: (name) =>
            resolvePageComponent(
                `./Pages/${name}.vue`,
                import.meta.glob("./Pages/**/*.vue")
            ),
        setup({ app, props, plugin }) {
            return createSSRApp({ render: () => h(app, props) })
                .use(plugin)
                .use(ZiggyVue, {
                    ...page.props.ziggy,
                    location: new URL(page.props.ziggy.location),
                });
        },
    })
);
Make sure not to include everything in the ssr.js file since it will not be visible to visitors; this file is only for search engines and browsers to show the data within your page, so include only what is important to your data or only what will make your data available.
“By default, Inertia’s SSR server will operate on port 13714. However, you can change this by providing a second argument to the createServer method.” Inertia DOCss.
The Inertia.js DOCs aren’t explaining how to integrate Inertia SSR with Vite, but we will go through this now. Head to vite.config.js and paste the below:
import { defineConfig } from "vite";
import laravel from "laravel-vite-plugin";
import vue from "@vitejs/plugin-vue";

export default defineConfig({
    plugins: [
        laravel({
            input: "resources/js/app.js",
            ssr: "resources/js/ssr.js",
        }),
        vue({
            template: {
                transformAssetUrls: {
                    base: null,
                    includeAbsolute: false,
                },
            },
        }),
    ],
});
Next, head to package.json and change the build script:
"build": "vite build && vite build --ssr"Now if we run npm run build, Vite will build our SSR bundle for production. For more information about this you may visit Inertia SSR DOCs and Vite SSR DOCs.
Title and Meta
Because JavaScript applications are rendered within the document’s <body>, they cannot render markup to the document’s <head> because it is outside of their scope. Inertia has a <Head> component that may be used to set the page <title>, <meta> tags, and other <head> components.
To add <head> element to your Page, we must import <head> from Inertia same as we did with <Link> component:
import { Head } from '@inertiajs/inertia-vue3'

<Head>
  <title>Kinsta Blog</title>
  <meta name="description" content="Kinsta blog for developers">
</Head>
We can also add a global title for all pages, this will add your application name next to the title on every page. We already did that in the app.js file:
createInertiaApp({
    title: (title) => `${title} - ${appName}`,
    //
});
Which means that if we add <head title="Homepage"> in our application’s homepage with a title, this will be rendered like this: <title>Home - My App</title>.
Monitoring Your App
Speed is one of the most important factors in optimizing SEO performance on your website. If you use WordPress for your website, for this reason, Kinsta APM will assist you in monitoring and keeping a close eye on your application in action. It helps you identify WordPress performance issues and is available for free on all Kinsta-hosted sites.
Summary
Inertia.js is one of the most significant technologies available; mix it with Laravel and you have a modern Single-Page application built with PHP and JavaScript. Taylor Otwell, the creator of Laravel, is so interested in Inertia that Laravel has launched its most popular starter kits, Laravel Breeze and Jetstream, with Inertia and SSR support.
If you’re a Laravel fan or a professional developer, Inertia.js will undoubtedly catch your eye. In this tutorial, we made a very basic and straightforward blog in only a few minutes. There is still plenty to learn about inertia, and this may only be the first of many articles and tutorials.
What else about Laravel would you like us to explore? Let us know in the comments section below.
Get all your applications, databases and WordPress sites online and under one roof. Our feature-packed, high-performance cloud platform includes:
- Easy setup and management in the MyKinsta dashboard
- 24/7 expert support
- The best Google Cloud Platform hardware and network, powered by Kubernetes for maximum scalability
- An enterprise-level Cloudflare integration for speed and security
- Global audience reach with up to 35 data centers and 275+ PoPs worldwide
Test it yourself with $20 off your first month of Application Hosting or Database Hosting. Explore our plans or talk to sales to find your best fit.